
How to integrate cert-manager with Let's Encrypt and Cloudflare

If you're looking to automatically issue and renew certificates using cert-manager and Let's Encrypt for a domain record managed and proxied by Cloudflare using Full (strict) TLS, you're in the right place. The process is straightforward, and you'll have everything set up in under 5 minutes.
Install cert-manager
Ensure that cert-manager is correctly installed on your cluster. I recommend using the official Helm chart for installation. Alternatively, you can apply the manifests for the latest version (v1.15.2 at the time of writing).
kubectl apply -f https://github.com/cert-manager/cert-manager/releases/download/v1.15.2/cert-manager.yamlGenerate a Cloudflare API token
To prove domain ownership using the DNS-01 challenge, we'll need to provide cert-manager with a Cloudflare API token. This token allows cert-manager to create a TXT record under the domain for which we're requesting a certificate.
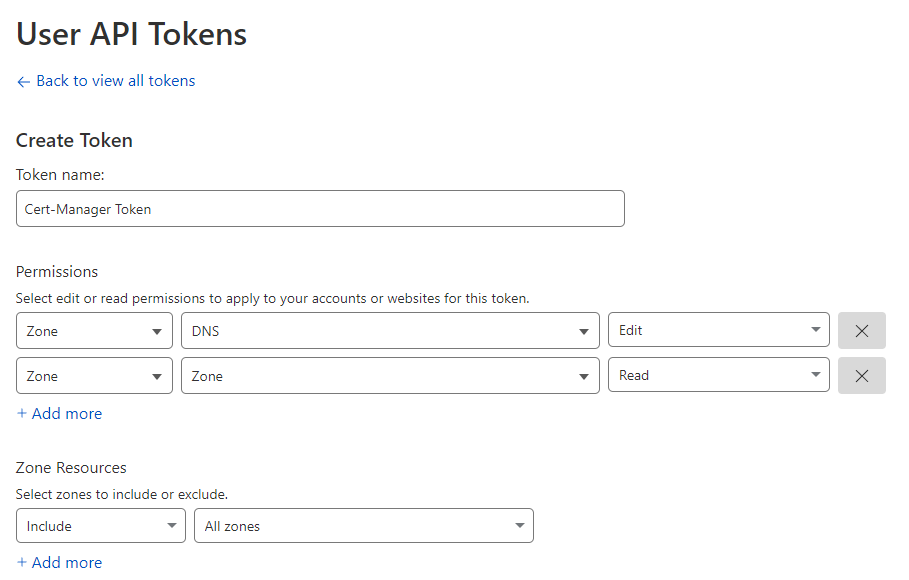
Make sure the token has the following permissions on all target zones as shown in the picture below:
- Zone - DNS - Edit
- Zone - Zone - Read
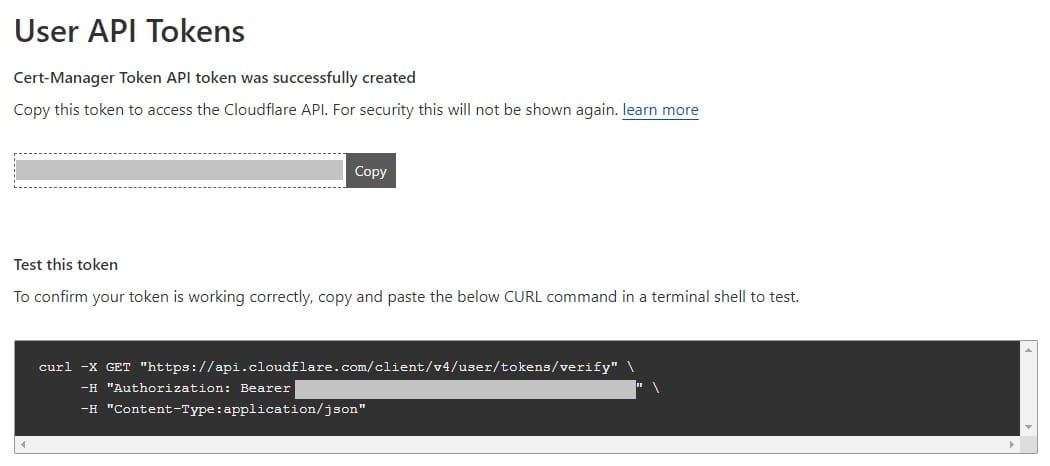
Don't forget to copy the value before closing the browser tab. 😅
Create a Kubernetes Secret
Let's wrap the token generated in the previous step in a Kubernetes Secret.
kubectl -n cert-manager create secret generic cloudflare --from-literal=token=<Cloudflare API Token>Configure the Cluster Issuer
We're now ready to configure our cert-manager ClusterIssuer. Use the following file as a template and replace the email where necessary. Something I wish to highlight is that we are using a dns01 solver rather than http01. I'll later explain why.
apiVersion: cert-manager.io/v1
kind: ClusterIssuer
metadata:
  name: letsencrypt-prod
spec:
  acme:
    server: https://acme-v02.api.letsencrypt.org/directory
    email: <your email>
    privateKeySecretRef:
      name: letsencrypt-prod
    solvers:
    - dns01:
        cloudflare:
          email: <your email>
          apiTokenSecretRef:
            name: cloudflare
            key: token
Save it and apply it.
kubectl apply -f cluster-issuer.yamlGenerating a TLS certificate
For this example, I am going to create a pod running nginx which I intend to expose on https://test-proxy.marcolenzo.eu.
Configuring the DNS record
I first make sure the DNS record is properly configured on Cloudflare. I am using a CNAME but you can use an A record if you wish.

Creating Namespace, Pod and Service
Now I create quickly namespace, pod and the necessary service.
kubectl create ns test
kubectl -n test run nginx --image nginx
kubectl -n test expose pod nginx --port 80
Defining an Ingress with TLS managed by our Cluster Issuer
Then, I define the Ingress. Use my configuration as a template for yours.
apiVersion: networking.k8s.io/v1
kind: Ingress
metadata:
  annotations:
    cert-manager.io/cluster-issuer: letsencrypt-prod # ClusterIssuer name
  name: test
  namespace: test
spec:
  ingressClassName: public # kubectl get ingressclasses (if you don't know it)
  rules:
  - host: test-proxy.marcolenzo.eu # replace with your domain
    http:
      paths:
      - backend:
          service:
            name: nginx
            port:
              number: 80
        path: /
        pathType: Prefix
  tls:
  - hosts:
    - test-proxy.marcolenzo.eu # replace with your domain
    secretName: test-proxy-tls
Make sure to replace the ingressClassName, host, and hosts with the proper values. Save to file and apply.
kubectl apply -f ingress.yamlSuccess!
That was it! Now we can simply verify that the certificate was issued correctly.
kubectl -n test get certificate test-proxy-tls -o wide
NAME             READY   SECRET           ISSUER             STATUS                                          AGE
test-proxy-tls   True    test-proxy-tls   letsencrypt-prod   Certificate is up to date and has not expired   11m
If you want to read the content of the certificate use the following command.
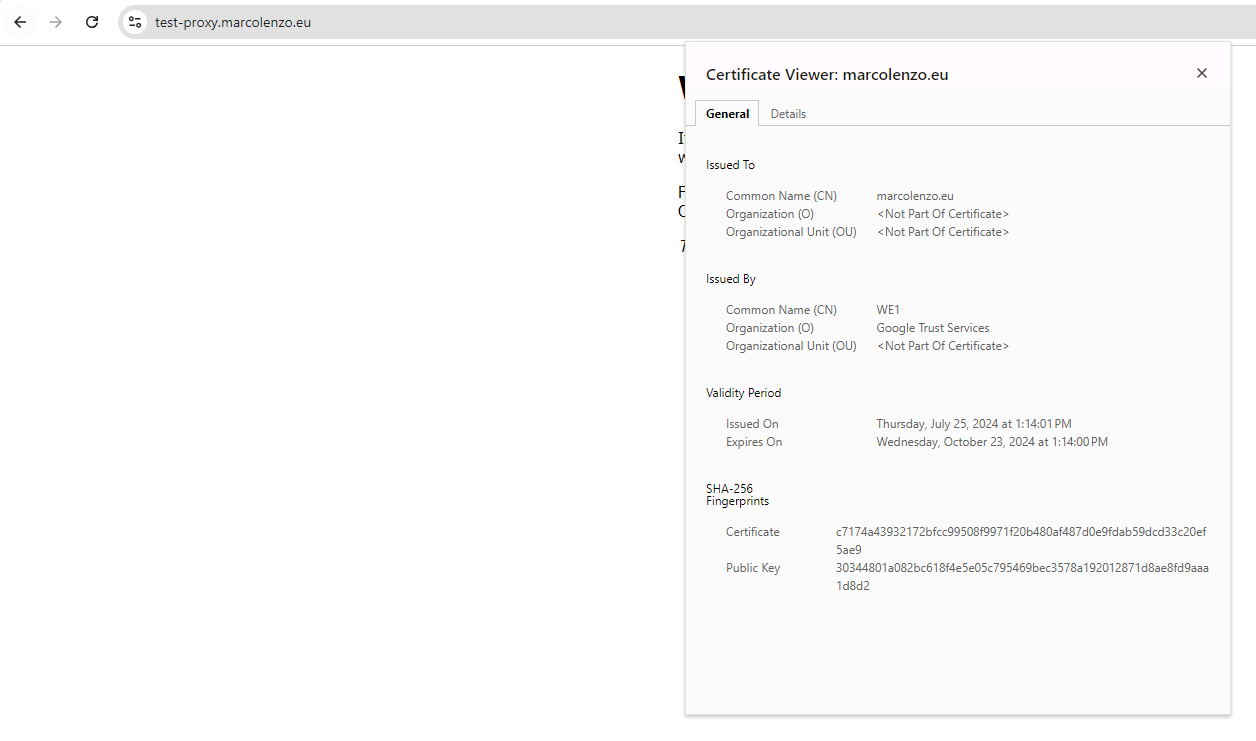
kubectl -n test get secrets test-proxy-tls -o jsonpath='{.data.tls\.crt}' | base64 -dNotice that you will not be able to see the same certificate on your browser since the request is proxied through Cloudflare which offers a different one.
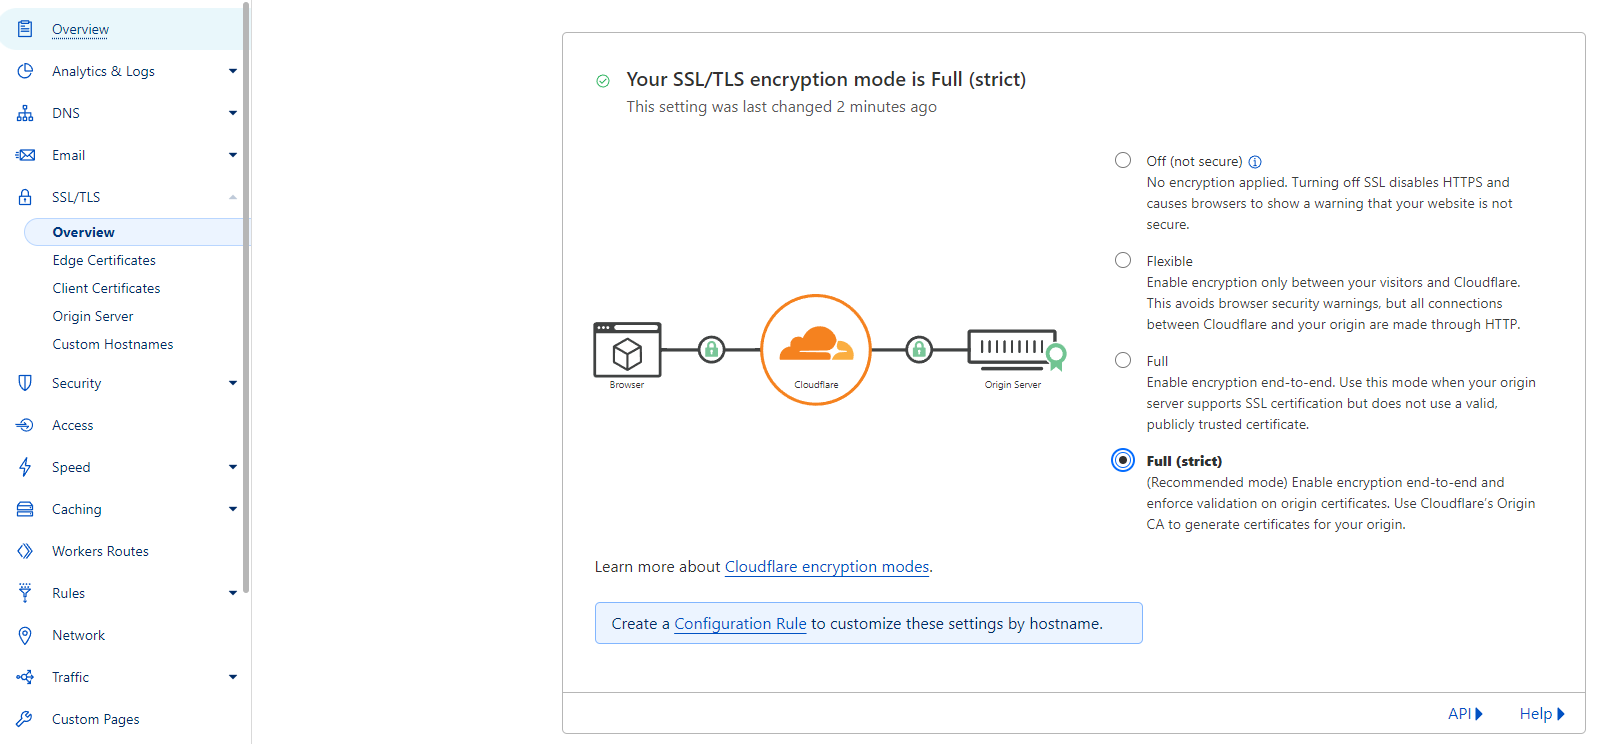
The reason we need a valid certificate on our backend is to enforce Full (strict) encryption for our website on Cloudflare. Without this setting, all our efforts would be in vain, as Cloudflare would accept a self-signed certificate on our backend.
Why is the HTTP-01 Ingress solver incompatible?
Before issuing a certificate, Let's Encrypt verifies ownership by performing challenges as defined in the ACME standard.
When using the HTTP-01 challenge, Let's Encrypt gives a token to our ACME client (cert-manager in this case) which must be served as a file on our webserver at http://<YOUR_DOMAIN>/.well-known/acme-challenge/<TOKEN>
Unfortunately, this approach cannot be used if you intend to proxy requests on Cloudflare, because the request above will be served by the Cloudflare proxy and not the backend running cert-manager!
Conclusion
Hope this helped. Feel free to subscribe to the newsletter and comment below if you need more help!